
How-To: Paint DIY Sidewalk Stencils
/
Street Stencils
Share messages, calm traffic, engage community members and spread art through simple, temporary street and sidewalk stencils.
What are Street (or Sidewalk) Stencils?
Street stencils are large-format stencils that you can use to paint symbols and messages onto any paved or solid surface. Most of us pass by them all the time — bike symbols, crosswalk markings, or handicapped parking designations. But there are far more ways to get creative with stencils. You can use temporary/DIY versions of bike and pedestrian markings to test out street changes before making them permanent (work with your transportation authorities and get permission!). You can paint messages or words to raise awareness or capture people’s interest in surprising places. And when it comes to art, there’s no limit.
Before You Go Further….
If you are planning to stencil a road or sidewalk, take it seriously and work with the right authorities. The wrong choices could mean big legal trouble for you — or worse, a bad accident for someone else. Start by reaching out to your road crew or public works department, planning department or property owner.
Materials
There are many options for the type of stencil and type of paint you use, but the basic material list is pretty simple:
Stencils (pre-cut) OR blanks to create your own (foam sheets, mylar, posterboard, lightweight plywood or other)
Double-sided tape or adhesive spray (for some stencils)
Paint (tempera or chalk paint for temporary stencils, or road marking paint for longer-term)
Spray can, paint sprayer, roller or brush
Cardboard or masking tape
Steps

The first step is to decide what you want to stencil, where, and for how long.
1. SCOPE YOUR PROJECT.
The steps and materials for your stencil project will vary a lot depending on what you want to stencil. Start by getting clear on the details, where you want to stencil, and for what purpose. If you’re just stenciling your driveway, then skip right to the fun part. If you’re planning a larger project or using public property, then you need to plan and get permission before you go any further..
2. GET DOWN TO DETAILS.
Once you know generally where you’ll paint and what’s allowed, start getting specific. Look at your site and find a spot that’s as smooth, flat and clean as possible. Measure, so you’ll know how large your stencil can be. Think about how much your stencils will be exposed to weather, how much foot traffic they will receive and how long they need to last.
Purpose. What will your stencils do? Are they for traffic calming, communications, signage, or just for fun? Getting clear on purpose will narrow your other choices.
Site. Where do you want to stencil? Think carefully about your purpose and what locations would be ideal to reach the right people and have the right impact. But also think about practical details: the better the condition of your surface, the better the stencil will come out. Look for flat, smooth, sturdy spots.
Timing. How long do you want your stencils to last? What’s the weather forecast?
Number & Size. How much surface area do you want to paint? How many times will you reuse the same stencil? These are important questions that will shape your budget, your paint choices, and your stencil materials.
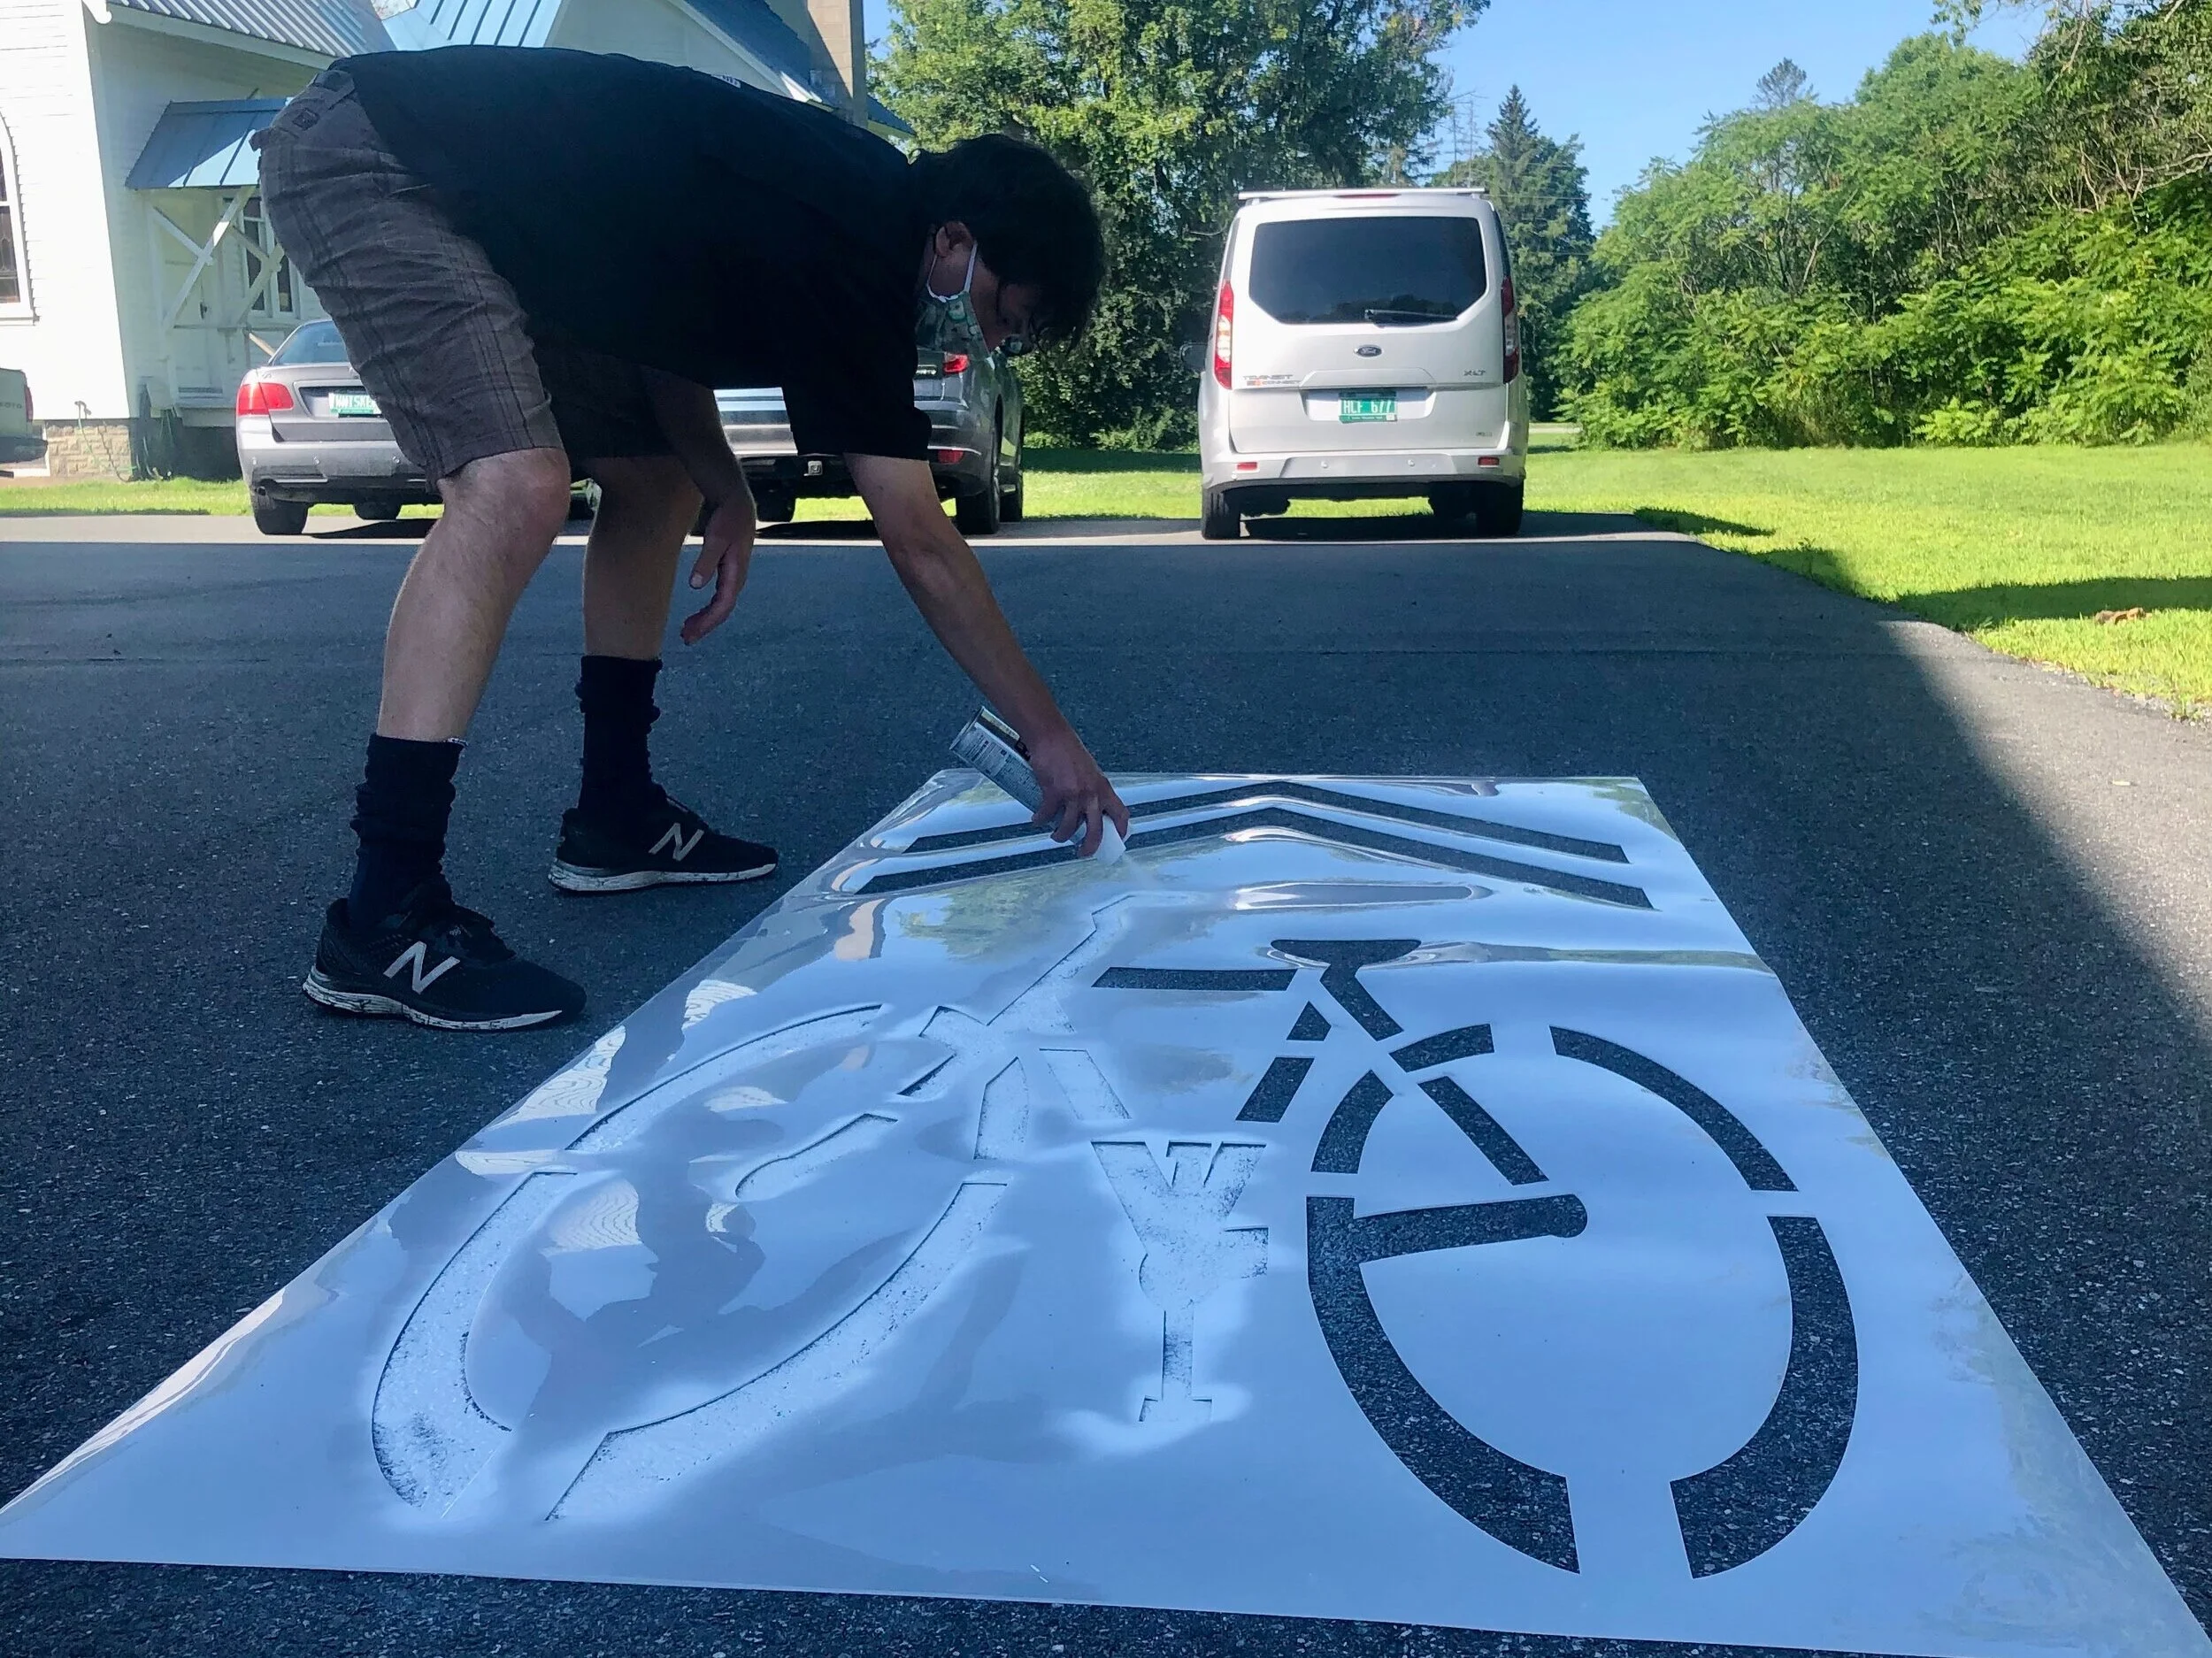
3. DESIGN YOUR IMAGE. Making stencils is the hardest part, so consider buying one ready-made; it’s fun to make your own, but professionally-cut stencils usually result in better designs. It’s easy to find large numbers, letters, basic shapes and bike or pedestrian symbols. If you’re making your own, draw it yourself or look for a printable stencil or image online. You can also take your design to a fabrication shop to cut it professionally. You’ll need a graphic with simple and clean lines that can be done in a single color (multi-colored stencils are usually done with separate stencils and layers). Pay attention to what’s left when you cut. You may need to edit an image to simplify or change the size. When in doubt, try it out on scrap paper.
4. CHOOSE A MATERIAL. You’ll draw, trace or print your design onto a stencil “blank” or material. Mylar or plastic stencil materials work the best and hold up for small stencils, but they can be hard to find. Foam craft sheets are cheap and durable. Posterboard and cardboard are great for large stencils, but you’ll need to laminate or reinforce the edges so they’ll hold up to wet paint. Here are a few things to think about when choosing a material:
If you plan to re-use the stencil, stay away from materials like paper or posterboard. They will start to disintegrate after the first paint is applied.
If you’re planning a large stencil (like street markings), you’ll probably need a thick, sturdy material to be sure it stays in place. Look at thick cardboard, laminate, heavy plastic sheeting, or even a yoga mat.
5. MAKE YOUR STENCILS. You can always draw or trace designs onto blanks. You can print directly onto some materials. You can attach a paper printout to the stencil material and cut through both layers. You’ll need a sharp utility knife, scissors, or a stencil cutter to cut. Use a flat mat and work on small sections at a time.
PRO TIP: If you need to enlarge an image, use a computer and projector. Open the image on your computer, hook up to the projector, and tape your stencil material to the wall. Focus the projector on your stencil material and zoom in or out until your design is the right size. Now trace!

Most “temporary” chalk paints won’t just rinse off. Research and test them carefully before applying.
6. PICK A PAINT. The right paint depends on your surface, how long it should last, and what’s allowed. Test your paint and stencil ahead of time to see how well they apply, how much they run, how well they hold up and how easily you can remove them.
Professional spray chalks or marking chalks are easy to apply, fairly durable and come in multiple colors. They may smudge with rain but take awhile to wear off.
Kids’ spray chalks are intended to wash off easily (but test to be sure!). They usually come in small cans and may be expensive.
Chalk paint mixes are cheap and easy. Make them thick or thin as needed and apply with a brush or roller. Try grinding up sidewalk chalk sticks to make your own, or make another easy paint from cornstarch, water and food coloring.
Tempera paint is easy to find and clean. It may smudge with rain but holds up to foot traffic. You can paint or roll it on or thin and use a paint sprayer. If you’re looking for something semi-permanent, you can use latex house or indoor paint the same way.
7. CHOOSE A WINDOW AND PREP YOUR SITE. Timing is everything when it comes to stenciling. Good weather and drying conditions are critical. If you’re stenciling a road or sidewalk, aim for a day or time with low traffic and figure out how long the paint needs to dry. If you’re using a temporary chalk paint, also think about when you need it to look great and don’t paint too early — if it rains before your big event, your hard work can wash away. Prep your surface just before you paint: it needs to be clean and dry. Sweep up loose dirt and dust and then use a damp cloth or mop if needed. If you’re going to be outside, choose a clear, dry day. Set up a barricade or “wet paint” signs. Consider applying a base color if you want your design to stand out.
8. TEST & STENCIL. Do a couple of test runs to perfect your technique before you start stenciling. Position your stencil and step back to be sure it’s right-side up and in the right place. If your design is close to the stencil edge, use cardboard or tape to mask around it. Use tape or a light spray adhesive to hold your stencil in place if needed. Paint away, but don’t apply too much—it can run or bleed. Carefully lift your stencil straight up to see how it came out. If needed, put it back and touch it up. Wipe it off before placing it down again.
9. CLEAN UP. It may be okay to let your stencils gradually fade away, or you may need to remove them. If you’ve tested your paint, you’ll know what it takes to clean it off. Water and a scrub brush will work for most temporary paints. Don’t use solvents, cleaners or pressure washers unless you know they won’t damage the surface.
This resource was developed for Vermont’s monthly Placemaking Meet-Up series — informal gatherings designed to connect placemakers and spread great ideas. Join AARP Vermont & Community Workshop for an upcoming meet-up or check out resources from past events.
Upcoming Events
Meet-Up Resources


It’s the season to get back outside. What better place than our streets?